Fcpx How to Sop the Video From Starting Again
This chapter is from the book
Examining Clips
Now that you have control over sorting your clips, it's time to actually picket your media. The process of reviewing or skimming your footage will make it easier to tag footage with keywords and roles, likewise as help you lot find the best shots.
Taking the time to review your footage and annotate information technology greatly improves your terminate results. When an event is selected in the Event Library, you can view its clips in the Event Browser. This is the outset step toward viewing and organizing your footage.
Viewing Individual Clips
When you've located a clip in an event, you lot have several ways to view its contents. It's important that you learn how to use the dynamic preview capabilities of Last Cut Pro 10 to speed up your edit workflow.
There are two primary tools that you'll use for playback and previewing: the playhead and the skimmer.

The J-K-L keys will quickly go an integral part of your keyboard controls.
Playhead
The playhead indicates your current position within a project. The playhead appears every bit a sparse, greyness vertical line. By and large, the playhead is static, but you lot tin reposition information technology by clicking in a clip or your Timeline. The playhead does motility when y'all click Play to indicate progress equally a clip or Timeline plays dorsum.
Here are a few tips to control playback:
- Press the spacebar to start or stop playback.
- To play a clip from its offset, printing Shift+Command+I.
- To play just a function of a prune, click and drag the yellow handles to ascertain a frame range. Press the Forward Slash (/) key to play just the selected office of the clip.
- If you do non select a range, you tin nonetheless press Shift+Frontward Slash (/) to play two seconds earlier and after where the playhead is parked.
- You lot can apply the J-K-L keys to command playback:
- Press L to play forward.
- Printing J to play backward.
- Press K to pause the video clip.
- To double the playback speed, tap L or J twice. Tap again for farther incremental speed changes.
- To move the playhead 1 frame at a time, hold down the K key and tap J or L.
- To move the playhead in irksome movement, hold down the K key while pressing downwards J or 50.
Skimmer
Another method for previewing clips is the skimmer. Using the skimmer lets you lot motion the mouse to freely preview a prune without affecting the playhead position. The benefit of the skimmer is that information technology lets you lot quickly review several frames in a clip by only moving the mouse (all without losing your current position).
The skimmer appears equally a thin, pinkish vertical line equally you move the pointer across the clip. The skimmer temporarily turns orangish if snapping is enabled and the skimmer snaps to a position. Snapping makes it easier to drag betwixt markers and In points, for instance.

Renaming Clips
By default, DSLR media has pretty useless filenames (they're not unique, and it'southward very easy to have indistinguishable filenames). Fifty-fifty if all your files accept different names, how useful is a proper name like MVI_04567.mov? Fortunately, you lot tin can easily rename clips within your consequence. You can rename clips in the Event Browser or in the Info inspector anytime y'all want. Notation that when yous rename a prune in Terminal Cutting Pro X, it does not rename the source media file on your disk. Here are a few means you can rename clips:
- Rename a clip in the Consequence Browser in Filmstrip view. If you lot're in Filmstrip view, simply select a clip's name and type a new name.
- Rename a clip in the Event Browser in List view. If you're in List view, simply select a clip'southward proper name, press Return, and and then type a new name.
- Rename a clip in the Info inspector. Select a prune in the Info inspector by clicking the Inspector button in the toolbar. Click the Info push at the meridian of the pane that appears. You tin can and so click in the Proper name field and type a new name.
Organizing Clips with Roles
When you import clips into Final Cutting Pro X, the awarding automatically assigns metadata text labels. These labels are based on 1 of five default roles: Video, Titles, Dialogue, Music, or Effects. You can also create custom roles and further refine with subroles that y'all can manually assign to clips. For instance, you lot tin assign the role of Interview to all of your sound bites to easily split them from the remainder of your footage.
Apple tree has positioned roles as the primary way to place related elements when working in the Timeline and when exchanging data with an XML file. Roles should go along to play a more important part as Final Cut Pro X continues to evolve and share media with other applications.
Setting Up Roles
A skilful place to get-go to gear up roles is to open up the Roles Editor. Choose Change > Edit Roles to see the current roles and subroles you've set. Roles are globally defined for the awarding, so you lot cannot accept different roles for different projects.
To create a new role, follow these steps.
-
To add together a new role, click the Assign New Role button at the lesser-left corner of the Role Editor window.
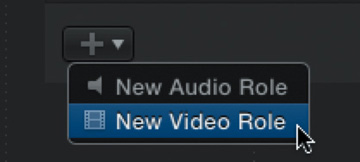
- Choose to add a New Video Office or New Audio Office.
- Click on the new role and enter a new name.
You can too add subroles to further refine a role category. For case, you tin can split the Video role into smaller categories like b-whorl, behind the scenes, reenactment, and so on to make it easier to categorize your footage. Creating subroles is easy.
-
Click a role to select it.

- Click the Subrole button at the bottom eye of the panel.
- Click on the new subrole and enter a new proper noun.
The Rules
Go on in mind that in that location are a few rules when it comes to using roles:
- Every clip must have at to the lowest degree one assigned role.
- If a clip has audio and video, it will ever take one sound and one video role.
- Y'all cannot assign a video role to audio-only clips or an audio role to video-just clips.
- Roles cannot exist assigned to a prune range or a portion of a clip.
- Y'all tin assign different roles to each case of a clip. For example, a clip in the Timeline can accept a different function assigned in an event.
- To delete a subrole or a custom function, just click to select it and printing the Delete key. You lot cannot delete the original five roles, notwithstanding. You'll as well demand to make sure that no clips are assigned to a subrole in your events. Once cleared, the part or subrole volition no longer appear equally an option when you relaunch the awarding.
Assigning Roles
You lot can assign roles to clips at whatsoever point in your editing. In fact, y'all can assign a role in the Effect Browser, the Info inspector, the Modify card, or the Timeline Index. Here's how:
-
View and reassign roles in the Consequence Browser. With one or more clips selected in the Issue Bowser, you can use the Roles column. Brand sure you lot are in Listing view and that you tin can encounter the Roles column (if it's not visible, Control-click a column head and choose Roles). You can then click the assigned role for a clip to see a shortcut carte listing the available roles. Merely choose additional roles that you lot desire to assign.
-
View and reassign roles in the Info inspector. With ane or more clips selected in the Event Bowser or Timeline, you can use the Info inspector. If information technology's not visible, click the Inspector push in the toolbar and click the Info button at the superlative of the pane that appears. You can click in the Roles field to choose from available roles.
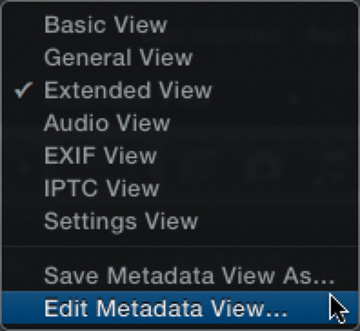
- If the Roles metadata is not visible, click the View push button at the bottom of the pane and cull Edit Metadata View. You tin can so apply the search field and enter roles. Select the Roles field to add information technology to your view.
- View and reassign roles in the Alter carte. An piece of cake manner to assign roles is to use the Modify menu. With a clip selected, merely choose Modify > Assign Roles, and cull a role from the submenu. Once selected, a check mark appears next to the roles in use.
-
Use keyboard shortcuts. If yous want to assign roles using the keyboard, that's possible also:
- Video (Control+Option+V)
- Titles (Control+Option+T)
- Dialogue (Control+Option+D)
- Music (Control+Option+Thou)
- Furnishings (Control+Choice+E)
- View and reassign roles in the Timeline Index. Subsequently yous've added clips to a Timeline, you tin assign roles. This function is frequently used to help assign track-based output for files (such equally when going to tape). You can besides use roles to help you isolate clip types in your Timeline (even making entire roles invisible by deselecting them).
- Open the Timeline Alphabetize by pressing Control+Shift+ii. View your clips in apply past clicking the Clips pane at the peak of the Timeline index. Use the Roles cavalcade to add roles to your clips (if it'south not visible, just Control-click on the heading and choose Roles from the menu). You lot can then click on a role and add together or edit assigned roles.
abdullahtinur1952.blogspot.com
Source: https://www.peachpit.com/articles/article.aspx?p=1822623&seqNum=2
Post a Comment for "Fcpx How to Sop the Video From Starting Again"